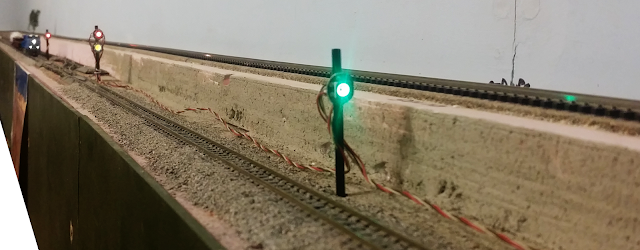
First post ... woohoo!

Coming soon, all these and more signals controlled by one single Arduino pin!

Popular posts from this blog

Not RRRduino, unless you have an MQTT connection via Ethernet or WiFi

JMRI code to connect to an MQTT broker, to publish and subscribe to the messages for signal masts. Of course, we agree to a standard for the MQTT topics, and since you were not here, we settled on "mast.xxxx" where xxxx is a number starting at zero. This MQTT topic is used as the User Name in a JMRI signal mast. Created as a Virtual Mast with the Aspect used as the payload in the message. And, yes, the device under the real mast needs to be programmed with the same name and code for each of the "aspect" payloads to be implemented. A yellow and red LED'd dwarf signal can not do a "Clear" aspect, so make sure "Clear" is maybe set to yellow for "Approach" as well.    Virtual Masts with agreed upon User Names. Comments are for the One Wire Signals on the NeoPixel string (see prior post)   Virtual Mast The Jython (or Python) code shown here below, is to attach a Listener to each Signal Mast, and to publish a message

Pi Pico, we smell competition in the land of the RRRduino! 

Pi Pico on an N-scale gondola Pi Pico, we smell competition in the land of the ‘duino!  Our very favorite low cost microcontroller system is seeing some fresh competition.  Everyone by now has heard about the Raspberry Pi, some fruity company in the United Kingdom, making single board computers!  They run Raspbian (or other flavors of Linux and are capable of some Windows versions) for as little money as $10 for the Pi Zero W.  The more popular Model 4, with 2 GB of RAM, retails for about $29.  Add a $5  micro SD card and you have a real computer with which you can surf the internet, write code and even program Arduinos.  It also runs our other favorite, JMRI.  Of course, plug it into a small or big screen television with an HDMI cable and you can even stream Netflix.  If you want a really cool computer built into a keyboard, also check out the brand new, Raspberry Pi 400 , you might just think you own a ZX Spectrum again. These are all “computers” with processors and now the Raspberry

Making things flash...yes LEDs!

So we have all seen the BLINK program, where we first configure the onboard LED to be an OUTPUT and then we turn the LED on, waste some time, turn the LED off and waste some time in the loop() function and then everything repeat again. So, that is really cool and 25 times faster using an Arduino, compared to 25 years ago where you had to erase the EPROM with a UV light first before you could upload the code that you tediously wrote in Assembler! And the 8051 did not have all the awesome built-in modules to simply do: Serial.begin( 300 ); // yes it was slow back then Serial.println( "Hello world" ); // and remember the extra work to do a String? // while \n and \r was needed too!!! Part I: So, back to the LED, the next question you ask is: "I have at least 17 more free pins , can they blink too?", and the answer is "Sure!". But in the current digitalWrite( 13, HIGH ); delay( 500 ); digitalWrite( 1